Showing posts with label tutorial. Show all posts

Saturday, May 26, 2012

Laura Mercier's Guide to Healthy Skin


Good day! I recently recieved 
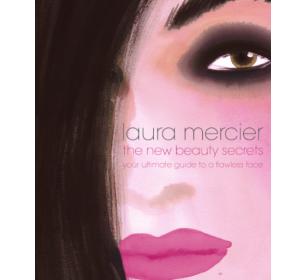
Laura Mercier: The New Beauty Secrets, Your Ultimate Guide to a Flawless Face
The book involve tips from your skin to your makeup, and since summer is coming along
a fresh face is key!
 
Laura Mercier, a makeup artist for famous stars such as Julia Roberts and Sarah Jessica Parker
has formulated some key pointers for a flawless face, and the first step comes for healthy skin.
Personally, I have bad redness and a spotty uneven skintone. 
Since starting this, I feel much better with my skin!
This routine is a guideline that allows you to pick and choose what you want, though I won't be reviewing the products I personally use, just mentioning them briefly. I do plan on reviewing a few of these in the future, plus reviewing the book further in a Laura Mercier Product Line Review.
Let's Begin!  
Your AM Routine 
"You can max your credit card on the latest creams but the truth is, you only need a few things."
  • Moisturizer with SPF- make sure it works with and not against makeup, Clean & Clear Morning Glow has an SPF of 15, but both my BB Cream and my face primer also have an SPF. Now of course, SPF isn't a math problem, and your SPF doesn't add up with the more products your wear with separate levels, "If your want a higher SPF, wear a higher SPF". Always protect your skin!
  •  A Light Cleanser- Laura also says just a "splash of water" is fine. But a light cleanser will open your pores for your moisturizer. Aveeno Smart Essentials is light, fresh, and not harsh.
  • "Layering Product"- it says a serum, but I enjoy going for the lightest products I can in the morning, as I'll be doing my makeup. Artistry Moisturizing Toner picks up any left over mess and makes you skin feel very soft.
Cleanser<Toner<Moisturizer
Your PM Routine
"If you slap  powders and colors on a complexion you haven't taken care of, it won't have the same effect"
  • Makeup-Remover: When I get home I just use baby wipes and a face wash in the shower, don't bother your skin with makeup for too long if you don't need to be wearing it anymore.
  • Cleanser: Loreal Go 360 is in the PM section of the photo, but don't use it every day. Personally, I think my uneven skin tone is from me harming my skin daily with exfoliates some time ago, they create scratches on your skin and it's not needed more than 2-3 times a week. So, I end up using that in the shower and then I use the Sea Breeze Deep Clean Astringent daily right before bed.
  • Serum- This goes hand in hand with a "Layering Product", but as I said, my toner wasn't much of either. If your have a treatment that is Day and Night , then use that as a replacement of the two. I use the Liolele V-Drop Sleeping Pack, which reduces redness and will have you wakeup to a fresh face.
  • Non-SPF Moisturizer- use a moisturizer that does not have an SPF in it , I use the Sleeping Pack for this.
Makeup-Remover<Cleanser<Serum/Moisturizer
MISC
"Nothing should be an obsession in life, but try to find a sense of balance in your skin"
  • Laura Mercier 's AM & PM recommendations is already a reward to a better complexion, but for personal problems, extra steps can easily be put in.  Treating yourself once or twice a month to whatever helps your own skin problems in great, such as a face mash, a peel, or a facial. I focus on alot of blackhead items, as that is more of my problem, along with collagen masks for my tired eyes.

Some last tips
  • Keep your hands/phone/hair out of your face. Pulling your hair back when you're home is great.
  • Pay attention to your diet and figure out certain triggers (EX: Dairy products sugar/alcohol).
  • Get enough sleep
  • Reduce your stress level.
  • Be seasonal with your skincare, work with the weather and how your skin acts in each season. For example, my skin gets very dry in the winter, but oily often in the summer. Here's the time to start anew!
 There you have it!
I hope this helped you, as I think it has really helped me : >
It's always better to have great skin, and not rely on the camouflage of cover ups
Please share your routines!
.
-Rei


Saturday, January 7, 2012

Sweet Treats Deco Tips: Review on glues

Review of Different Glues & Brands
Permanent Adhesives - Super Glue - Hot Glue
 
All three of these different types of glue can be easily used to deco, but these glues can also ruin a case if not used correctly! So I am here to share with you some quick reviews of glues I have used throughout the couples years spent decoing and the many trials and errors I have had.
Permanent Adhesives

 From left to right, these are what I have used in order of time. All worked rather nicely, but I felt like E-600 was the most strongest in odor, the packaging cracked to where it was taped up from the holes that would gush out the glue, and in the end it couldn't be finished because it all dried up. Quick-Grip worked nicely, I think I've have the least problem with gems being eaten up from quick grip, but I've used it so long ago I can't give a decent review of it! Not to what I am current using, Goop works nicely, adheres great but I have no fantastic comments on it.
Best used on: most to all parts; gems, charms, ETC.
Best used: in small ammounts and lightly coated. (Example of what not to do below from first deco)
 
When generously applied, the backing of gems will become damaged.


Super Glue
 Super glue was probably manufactured in the pits of hell. It's ridiculous and messy. Jewelry + Metal glue is alot more pastey than the other two, which is great. I would never use it directly on a case, given that if you don't apply gems in time you will be left with a bumpy surface; as compared to Permanent Adhesive where you can easy peel off excess. Brush on nail glue and liquid nail tip glue in better for smaller parts, where you have the liquid substance applied on a old plate or something, then transfer it with a toothpick and add the gem, as you would do on nails.
Best used on: small rhinestones, charms.
Best used: Indirectly and carefully. It can and will fog up gems.

  
Best used when making a case such as this
Hot glue
 A low 10 watt glue gun works the best, and it's a great price, as most of the glue I have reviewed in around 8 dollars and makes close to 3 phone cases, this gun plus a large bag of glue sticks can be around 10 dollars and make several more cases. Any higher temp glue guns with probably melt or be dangerous! The only probably is, used hot glue is hit or miss. You cannot move gems around as compared to Permanent Adhesive, and it cools down much quicker.
Best used on: mostly anything, great for large charms
Best used: lightly and carefully!
Glues I would like to try
My friend gave me a silicone based glue once, but when it came to me it was totally dried out. I hope to try it in the near future! I used white silicone before to adhere a charm, but I do know silicone when used as whip cream peels off, as said by a customer. Though she said it was easily repaired with some glue. If you would like to reccomend some glue for me to try, please comment below!

Much Thanks! 

Saturday, April 9, 2011

acrylic recovery: An easy how to

There's always a point in time where I decide if I want to get a fill or take my nails off
I decided that I have more Spring cleaning to do and I want to also start on some deco projects, so getting a fill wasn't the best choice.
I hope to save up alot of money for the summer!

 So with that, I took them off, haha.
One thing I really hate is once they're off, your nails are brittle, flaky, and uneven.
I'll share with you the methods I use to keep them bearable! <3
NOTE: I am no nail expert, these tips come from personal methods that work for me.
If you are in need of help, always read many tutorials/tips until you find the best one!


Helpful Things you may use
-Nail clippers- Do yourself a favor and don't bother trying to keep it a long length like mine were in the before. when you hit it against something, or hold anything the wrong way, it may hurt. It bends super easily and breaks like nothing. Don't bother with it and just cut your nails short.
-Nails file- file away top flakes and shape.
-Brush on nail glue/ nail strengthening coat/ clear coat nail polish- fill in acrylic imperfections and make nails stronger.Nail glue is fine, just be careful with drying!~
-Nail buff-smooth out nails, don't be too harsh, and only do it as much as needed.
-A nail technician-  cbghjsgh sorry I didn't know how put it any other way. If you have extra cash, Just go and get them taken off at a nail salon. It runs for about 5-10, and be very honest with if they are buffing your nail too much with their little drill. :C After acrylic your nails are very sensitive, no need in discomforting yourself!


Things to avoid
-Using your nails to remove flaked layers-Ahhhh when I see people doing this...Don't! you never know if you rip one off and it drags along for longer than you thought and now you have more dents that hurt :C
-Keeping them long until the arylic impression is fully grown out- No other way to put this other than "bend and snap!"
-Keeping your nails unfilled after they are lifting- BIG NO NO!! Make sure to get a fill once your nails begin to lift, water can get under them and bacteria grows.


Most of all, just take good care of your nails. I get nagged alot about having fake nails by family or people who think it's any of their business on what I do with my nails, just take care of your nails and it won't be an issue.


I get any questions on my nails, maybe I'll make a hefty Q&A for it including tips on getting cute nails at any salon !~

Until Next time,
Rei


Sunday, February 13, 2011

Sweet Treats Deco Tips: Fake Whipped Cream (Cheap + Easy to get !)


Hello! Alright, so this will be my first out of many "Sweet Treats Deco Tips" posts to this blog. Today we'll be discussing false whipcream!


False whip cream is common with decos involving fake sweets/food, or to give something a sweet and cute look! It can be a base to a case or a topping to a fake macaroon. Either way, Fake whipped cream is a great way to add a sweetie feel to anything.

Though expensive (along the range of 12-25 dollars) there are many brands that sell kits and bags of fake whipped cream just for deco. They usually come in colors of white (vanilla), brown (choco), and pink (strawberry), with some exceptions of pastel colored soft clays and silicone.

If you're interested in a little deco on a discount, never fear!

What you will need


A. 100% Silicone - Can be found at hardware stores and simple places such as Walmart (Where I got mine). A big tube like that runs for about 5 bucks, when you could get a bag of deco whipped cream for 10 dollars having less than half the amount of this. Make sure to get 100% silicone, usually it says something about "window purpose"
B. Insulate gun- To be honest I don't even know if this is what they are called. My dad already has one, so maybe if you have a handy man around your house you may already have this. I bet you can find it where ever you find your silicone, though!
C. Scissors- for your bag, you may need something more strong like pliers or wire cutters to open the silicone tube tip.
D.Plastic bag- This is fine, or a pastry bag. It may be more, but you can use a normal reusable frosting bag, because once the leftover silicone dries it's very easy just to peel it out from your bag. I'm using a plastic bag though, it's rather flimsy, so I had to us tape around the tip so the cake tip wouldn't squeeze through the bag.
E.Cake tips- Just 2 bucks for 4 tips! Plastic like this is fine, no need to get fancy : >. Again, when your silicone dries, it's easy to peel out of the tip.
-------

OPTIONAL
F.Face mask- I warn you, silicone fumes are horrible. Do this in a ventilated area, but a mask is optional
G.Gloves- Silicone isn't toxic to the skin or anything bad, but it feels nasty to me, you'll have a smoother time working with things too if you have gloves on.
H.Charms- Silicone is the best "glue" in my opinion, all you need to do is stick cute things in your cream while it's still wet and you're done!
I.Acrylic Paint- Add just a little to your silicone and mix, creating a new personalized color!
------
And Now Let's Get Started!

 You want to loosen the gun by unscrewing the knob until the tube fits into the gun's bed. Then retighten it until it's "stuck". The pressure of you screwing shouldn't release silicone until you pull the trigger. You can see a tab at the base of the knob, that's what you press to release the pressure so the silicone with stop pouring out.
Now with your bag, cut one of the corners (not big) and drop your tip into the bag, fitting it through the corner. For more durability on such a flimsy bag, put tape around the tip of the bag, just make sure to not block the tip's opening.

 Shoot an amount you see fit of silicone into the bag and near the tip.When you have enough, twist the bag shut like you would a normal frosting bag. Then squeeze out your design, steady and consistant!

 Practice before deco! See the best way you can do it, and how it looks. it takes about 30 minutes for it to get gunky, and a hour to be dry, give it a full 24 hours to dry. Remember to have fun!

And if you get some silicone on gems, it's very easy to peel it off if it's just a little bit. strays can be shaped with scissors after it dries too, and you can also smooth some things out with a tooth pick when it's still wet.
------------------------------

Well, that's all for now! I'll be reviewing glues next.
If you have any deco requests, drop a comment!


XOXO,
Rei


 And enjoy your Valentine's Day!